Red bean paste
16 oz bag dried adzuki beans
1/2 tsp baking soda
water for soaking
1 cup/ 200g white sugar
1 cup/ 200g dark brown sugar
2 tbsp neutral oil
1 tsp kosher salt
First we need to soak the beans. Place the beans in a bowl and cover with water and dissolve the baking soda. The baking soda will help soften the beans and retain some of the red color. Place the beans in the fridge overnight for 8-12 hours.
Next day drain and thoroughly rinse the beans.
Place the beans in a pot and cover with fresh water, enough to cover by 2-3 inches and bring to a boil. Once it boils for 5 minutes, drain and cover with fresh water. Adzuki beans can be astringent and this quick “blanch” can get rid of a lot of that.
Bring back up to a boil and cook until the beans are completely soft. This can take 40 minutes to an hour and a half depending on your soak time. But the beans should be soft enough to squish with your fingers.
Drain the beans and reserve some of the cooking water.
Pulse the beans in the food processor until you have a smooth paste. Add some cooking water to get it to spin if you need to.
Wipe out the pot you cooked the beans in and place the bean puree back inside with the oil. Place the heat to medium low and begin cooking out moisture from the puree. You’re going to need to stir constantly to avoid scorching particularly on the bottom.
Add the brown sugar and stir until completely dissolved. Next add the white sugar.
Continue cooking for 30 minutes or until you can grab a pinch of bean puree and shape it, almost like play dough. Add the salt.
Lay the bean paste flat on a tray and allow to cool completely before using or covering.
Bean bun
300g all purpose flour
1 tbsp powdered sugar
7g (one packet) active dry yeast
150ml water
1 tbsp neutral oil
1 tsp baking powder
Warm your water to 115f and sprinkle over your yeast. Wait 10 minutes for it to become bubbly and foamy.
Add your flour, sugar, and baking powder to a bowl. Slowly mix in your water and yeast mixture. Once all of the water is in, add the oil. Begin to knead until you have a shaggy dough. Cover and let this sit and hydrate for ten minutes.
When the time is up you can knead for 10 minutes or until you have a soft, and smooth dough.
Cut your dough into 75g portions. Keep any dough you’re not working with covered.
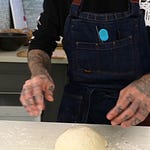
To shape these, take the portioned dough ball and knead it for 3 minutes or until it is extremely smooth. If there’s any excess gas in your dough, the bun will expand then shrink while steaming making your bun wrinkly. So really go to town kneading it before rolling it out. It will also make sure the surface of the bun is smooth for that signature look.
To roll out and shape your wrapper shape the dough into a small ball and using a rolling pin, roll from the outside edge towards the center. Stop at the center and turn your dough then repeat. The goal is to roll the edges out while leaving the center thicker for a nice shape.
Place around 2oz red bean paste in the center (I used an ice cream scoop) and close up your bun. Make sure to pinch and tightly seal the bottom.
Place your buns in your lined steamer baskets and let these prove for 30-40 minutes or until they’re puffy. They won’t quite double but around 1.5 the size. If your red bean paste is cold (right out of the fridge) it will be a longer proof time. So maybe pull that out ahead of time or make sure it’s room temp before making the dough.
Bring a pot of water you will be steaming with to a simmer.
If you’re not using bamboo steamer baskets and opting for something else, Place a towel inside if your lid before closing to stop water from dripping down on your buns. The water droplets will make pock marks all over.
After proving place your steamer baskets over your pot and then turn the heat to high to bring to a boil. Set a timer for ten minutes. When the timer is up, turn off the heat and let the buns chill for 5 minutes before removing.


Share this post